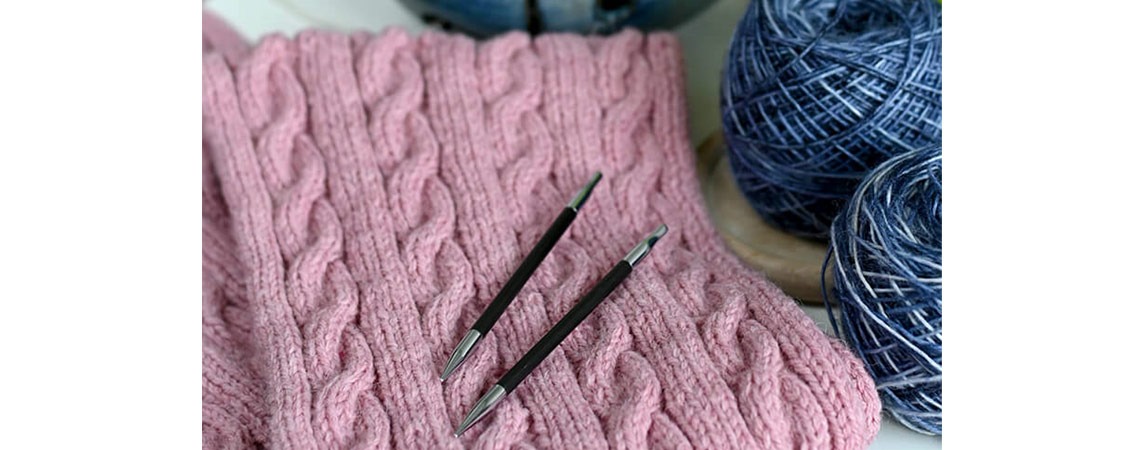
Cables are interesting stitch patterns. They have been a fashion statement for sweaters, hats, socks, mittens, scarves and pretty much anything. In fact, cable knit sweaters are big-screen hits that had so many knitters take out their knitting needles and the prized cable needle to make some men’s sweaters for the loved men in their lives. From a new knitter to the seasoned one, having the knowledge of how to knit cables make knitting projects more interesting.
There are probably thousands of cable variations, but all of them can be reduced to the placement of the stitches on a cable needle. Placing the needle with the stitches to the front of the project will make the stitches twist to the left. Keeping the cable needle to the back of the project will make the stitches twist to the right. As a substitute for the cable needle, many knitters use a stitch holder or even a double pointed needle. But, then again the unique design of the cable needle is generally recommended. The needle comes with grooves to make sure your stitches do not slip off when in use and the tapered tips ensure a smooth transition between the knitting needles and the cable needle.
To get you started with cable knitting, in this blog we’ll take a look at how to work the stitches and twist them into beautiful cables.
How to work Cable Knitting Patterns?
The best tip for knitting cable patterns is- to think visually and imagine the final effect. Look at the picture of the pattern and visualize how you would work on them. For any cable stitch pattern, you must ask the following questions:
- How many stitches (knit or purl) are you moving to your cable needle?
- Where to hold the cable needle - the project's front or back?
- How many stitches (knit or purl) to work before the stitches move on the cable needle?
- Do you knit or purl the stitches on the cable needle?
The answers to these will help in your cable knitting. It does not matter if you are knitting a 2×2, 3×3, 3x5 cable or any other combination. The technique is always the same and you will be able to follow the very same directions, just with a different number of stitches you need to slip onto a cable needle. Placing the stitches, basically the cable needle to the front or back side of the project is how you twist the stitches bringing out the special textured effect. All cable stitches are either twisted to the right or to the left. The combination of left and right cables across multiple rows creates stunning patterns.

Cable Knitting Gauge
Adding cables to a project significantly affects your stitch gauge. For a cable pattern, it is best that you knit the gauge swatch or the tension square in the same way. You’ll need to cast on more stitches to compensate for the change in gauge. Try adding half as many stitches as there are in the cables. For example, if you’re adding ten 3-over-3 cables (which use 6 stitches each), that’s 60 stitches total in all the cables, so add 30 extra stitches when you cast on stitches.
Cable Abbreviations
C#(f) or (b), where the “C” stands for cable and the # appears as an actual number. The “F” stands for “front” and “B” stands for “back”. Both of these tell you where to hold the cable needle while you’re knitting.
How to work the Right Cable Cross
Abbreviated with “Cable * back” or “C*B”.
Step 1: Slip the first two stitches on your left needle onto the cable needle (for C6B you’d have to slip three stitches).
Step 2: Bring the cable needle to the back of your work.
Step 3: Knit the next two stitches on your left needle as normal. Try to keep a nice tension so you close the gap without creating any holes.
Step 4: Bring the cable needle with the two slipped stitches back to the front (make sure you don’t twist the cable needle in the process).
Step 5: And now knit them as normal.
Step 6: Put the cable needle to the side and continue knitting as normal. Try to keep a very high yarn tension for the next stitches, so you don’t create any gaps.
The right cross cable on the right needle and continuing with a purl stitch.
How to work Left Cable Cross
The left cable cross works the same way as the right cable cross. The only difference is that you hold the cable needle with your slipped stitch in front. In knitting patterns, you will also find Cable * front = C4F.
Now, you can also cross any other combination of stitches. Just slip however many stitches you want your cable to be wide onto a cable needle or a spare knitting needle and cross them.
It can also be asymmetrical numbers you cross. Like slipping 2 stitches into the CN but then knitting 3 stitches (or vice versa).
Complex Cables
Almost all cable stitches will be worked just the same. Some complex patterns may use two cable needles with more than two sets of stitches but you should be able to follow even these by working each step of the pattern as written.
A common variation with a beautiful effect but in essence, a very simple technique is to purl the stitches in the back instead of knitting them. You’ll work the cable exactly as the instructions but remember to purl the stitches on either side of the cables to let the textures pop out.
Another complex type of cable you may find in some patterns is one that incorporates an increase or decrease. To increase the stitch all you need to do is either knit or purl a stitch twice or make yarn overs. The decrease means to k2tog or p2tog, either knit or purl two stitches together. With time you can proceed with Asymmetric cables, Celtic Knots, and pretty much anything that involves the textured stitches that pop up on a normal knitting pattern.
So, that’s how you work cable stitch patterns. Hopefully, this guides you through knitting your first cable knitting project. Besides the nitty gritty details of knitting cables, you must plan to block the pattern. Blocking is very important for cable stitches to shine through and relax. Take special care not to stretch the stitch pattern. You just need to lightly spray or steam block the knitted fabric.
For successful cable knitting, it will be of great help to learn how to fix a cable without ripping all you work back with our previous blog.


