You most likely already know some of the benefits of blocking. Today, we will give you a great overview of different blocking methods and which tools make blocking a fun part of your knitting and crocheting experience.
Blocking is not just another step in your knitting.
Really? Then what is it?
Well, let's find out together…
What is Blocking in Knitting?
Blocking is a great method to even out your stitches, let your yarn bloom and show its full potential in creating a nice, even fabric. Blocking makes your garment lovely to look at and even nicer to wear.
You might even be able to fix a few mistakes by blocking. For example, if your sweater sleeves are too short, you might be able to slightly stretch the fabric so that they fit better.
Blocking can also be used to calibrate your project. It isn't just about the needle size. You may find that after washing and blocking, the garment's final fabric can change drastically, even if you thought you used the right needles!
So, what's the answer?
It's simple. Make sure that you block your gauge swatch. Based on the results, this will allow you to select a correct needle size to account for changes in size caused by a final wash and block. Fibres nearly always change once they have been blocked.
Depending on the fibre and what you are trying to achieve, the method you use to block can make a huge difference.
Keep reading to see some great ways to block your garment.
Wet Blocking
Wet blocking is the most common method used in knitting. You soak the garment, remove excess moisture, then pin it to dry in the required size and shape. As the water dries, the fibres tighten and 'set' in their new form while being held in position on a blocking mat.
Here's how it works…
You soak the garment (or your gauge swatch) for 15-20 minutes in lukewarm water.
Obviously, not every kind of fibre is water-friendly, so check first to see if it is allowed to be wet.
Then once the fabric is soaked, we remove the excess.
Here's an important tip.
You must never wring or twist a garment to squeeze out the excess water. This can tear and damage fibres permanently…
So how do I remove the water?
The best way is to roll the garment into a dry towel and apply even pressure. You can even consider gently standing on it. You know better than anyone that a lot of love and time has gone into crafting your project, so treat it with care. Some types of yarn felt easily, so avoid manipulating it too much.
Once the excess water is removed, the piece can be spread out onto your blocking mats and pinned down in the desired shape.
Steam Blocking
Let's say that you've checked, and the fibres aren't permitted to be 'wet'…
So, I can't block my garment?
Yes, you can!
Steam blocking will still allow you to relax and shape those fibres. This method actually gives you a fair amount of flexibility too! You can steam the garment or swatch gauge first, before pinning it down. Or alternatively, pin it in shape and then apply steam.
But, be careful…
Man-made fibres can be damaged by steam and heat, so don't overdo it!
The approach you choose when steam blocking isn't just down to personal preference either.
Some fibres can't be shaped before steam or moisture is applied. Whereas others, like, say, cotton, change too drastically at the merest hint of steam. In this case, it might be better to pin your project down before steaming.
Here are some tips on how to steam block your garment.
First, get to know your fabric. Try steaming a smaller piece if possible (again, a gauge swatch is a great opportunity to perform a 'test). If your fabric is pretty durable, begin by covering it with a wet tea towel. Gently press a hot steam iron onto your project through the towel, and press the steam button.
Oh, and before we forget…
Keep the iron moving so that heat can't build up too quickly.
Once the towel starts feeling drier, your knitted piece is ready to be blocked if you haven't pinned it already.
For delicate material, consider using steam alone, without any of the 'ironing'. Here's how to do it.
Turn the steam function on your iron to 'high' and direct a jet of steam onto your knitted piece, ensuring that the iron doesn't make contact with the fabric.
Spray Blocking
For super delicate fibres, even steam might be too 'harsh.'
So, what's the answer?
Spray blocking is the gentlest way of blocking and suitable for very delicate fibres like cashmere.
This is how you do it….
To spray block your knitting, all you have to do is pin your item onto your blocking mats and then use a spray bottle to spritz some water onto it. Make sure the piece isn't soaking wet but damp enough to relax the fibres.
It's that simple.
If you aren't sure but think your project could benefit from just a little blocking, there are super gentle techniques… Try leaving your project hung outside on a misty or humid day. Putting your project In the bathroom after a steamy bath or shower can make a subtle difference to your fabric and fibres' behaviour.
Whatever your preference, it's worth talking about the tools that facilitate blocking to make your knitting look even better.
Why You Need Them
Blocking mats are very handy when you want to pin down your knitted piece. They create a consistent and even surface that makes it easy to attach pins.
And here's more…
Blocking mats help your project dry quicker by soaking up moisture. They also protect your floor. While you can block directly onto the floor, it isn't the best idea… Use a blocking mat.
Your carpet will thank you!
Can you Use Blocking Mats for any Project?
Yes indeed!
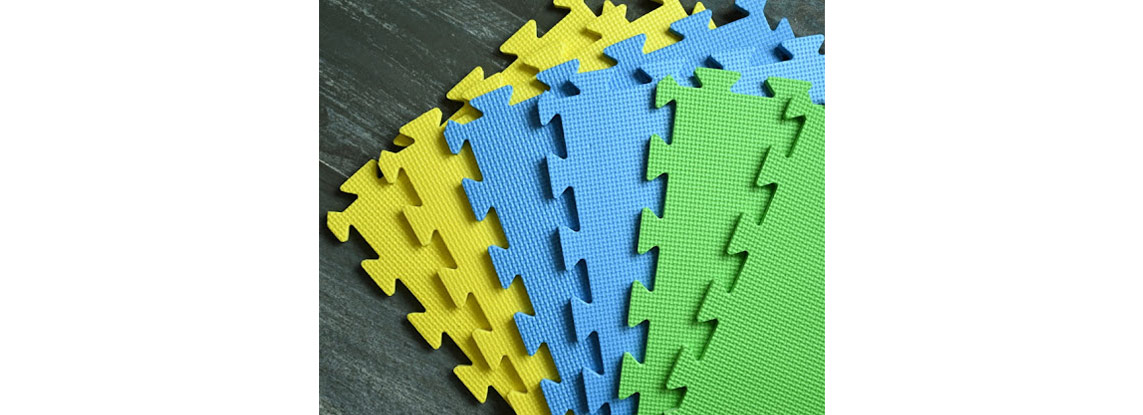
Our blocking mats come in a set of nine, and each mat measures 30cm x 30cm. They can be easily assembled and fit together so that they match your knitted piece's shape.
Are you blocking something long, like, say, a scarf?
No problem.
Just join the mats together to form a long strip.
Do you just want to block a pair of mittens?
Our blocking mats will have you covered for that too! All you need is one of the 30 cm x 30 cm squares to pin your mittens down.
You might have heard that children's play mats make a good option for blocking? While they might seem like a wise investment, many aren't colour-safe and certainly aren't designed to be wet.
What does this mean?
Simply, that wet dye from the mat could make its way into your project. Not good if you've spent the last two months knitting a beautiful bright white cashmere jumper!
Do I Need Specific Blocking Pins?
When it comes to pins, you have a couple of options. And whilst you might just want to use the ones that you have sitting next to your sewing machine, there are a couple of things that you might want to consider.
Such as?
A longer series of pins makes it much easier to get a big project pinned faster and more securely. As fibres shrink as they dry, there is a fair bit of tension generated. If a pin or two pulls loose, you could end up with a misshapen project! This is the opposite of what blocking is supposed to achieve!
All makes sense? Why not consider these options?
T-Pins
Our T-Pins, for example, are a bit longer than normal pins, so you can easily pin down a chunky sweater or hat. But most importantly, they are rust-free and therefore pose no risk of damaging your beloved knitted piece.
T-Pins come in particularly handy when blocking delicate work too, such as a lace shawl border,
Are you an impatient knitter? Take a look at the next option…
Knit Blockers
Yes, knit blockers are so much quicker than T-Pins, and if you have pets at home, you might want to seriously consider them!
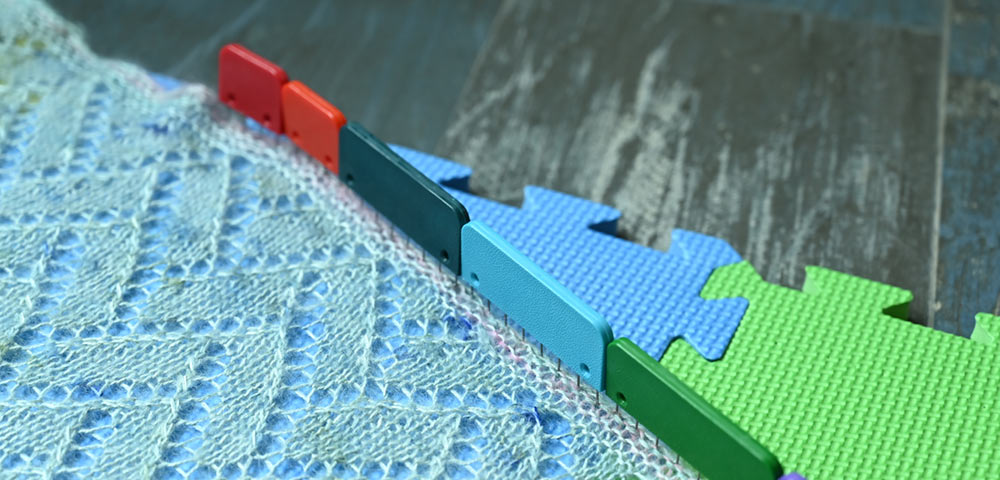
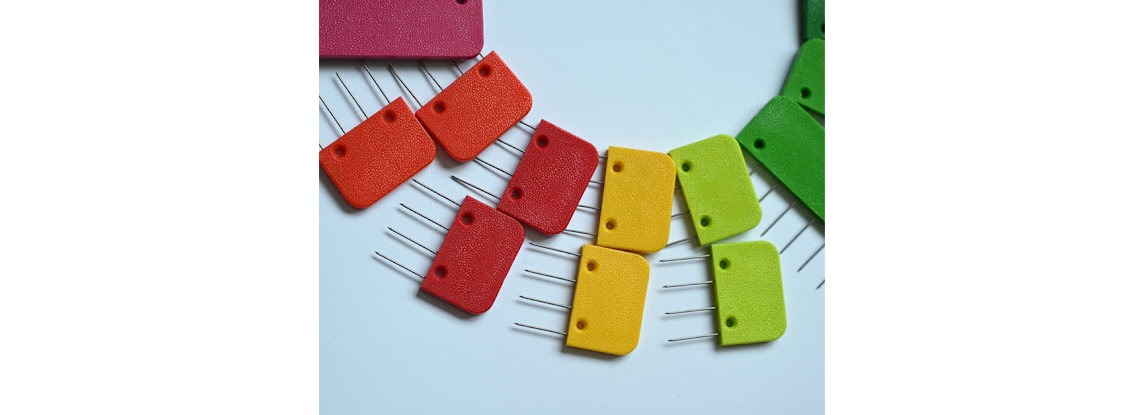
Not only are they much harder to lose (our rainbow knit blockers are really hard to miss!), they also make it much easier to pin down pieces with straight edges like shawls and sweaters.
Each package contains 12 bigger knit blockers and eight smaller ones. And they hold another big advantage, they all come with anchor holes for the blocking wires.
Blocking wires?
Yes, have a look below.
Blocking Wires
With the blocking wires, you can take your lace knitting to the next level.
And not only lace knitting…
Even sweaters, tops and blankets can be more evenly blocked by slipping the wires through the edges of your project and pinning the wires down with either your T-Pins or your knit blockers. Do you remember that we just mentioned anchor holes on your knit blockers?
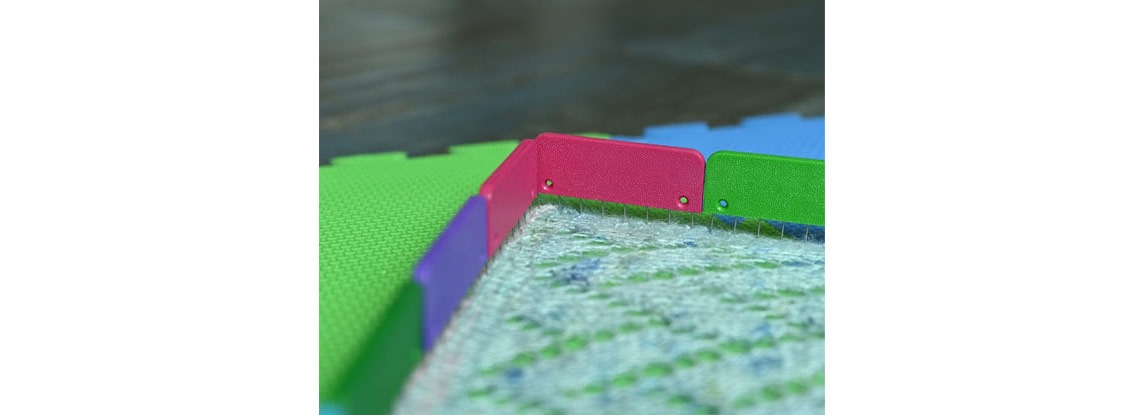
They are ideal, as you can insert the wires into the anchor holes. Who doesn't love great knitting tools that work well together?
Each tube of blocking wires contains different lengths of wires and even comes with a tape measure to make your blocking more accurate.
So, now that you understand the process… are you still not sure about blocking?
We can only recommend that you give it a go! After you have blocked your first project, we are sure that you will do it again… You'll be hooked (or maybe pinned?)
Let us know about your blocking experiences in the comments. If you have any questions regarding our blocking tools, please contact us via direct message on Instagram or Facebook or via email: Knitproeu@gmail.com.


