It's that time of year again. The days get shorter and all you want to do is snuggle into the couch cushions and get cosy in your home. Time to think about a new decoration for the season, maybe some presents for your long list of friends and loved ones. It's time to amigurumi.
Arugurumi is Japanese and means “little animal”. Arugurumi crafts are the perfect way to learn or improve your crocheting skills without getting frustrated because you don´t get to finish a complicated or laborious pattern. You can amigurumi anything. Furry babies, plants, almost any kind of fruit, cakes, even Christmas tree decoration. So, why not start now with a cute, little Halloween pumpkin that will perfectly decorate your windows, shelves and those of your friends, too? Take a look at our free patterns below which are suitable for beginners and intermediate crocheters.
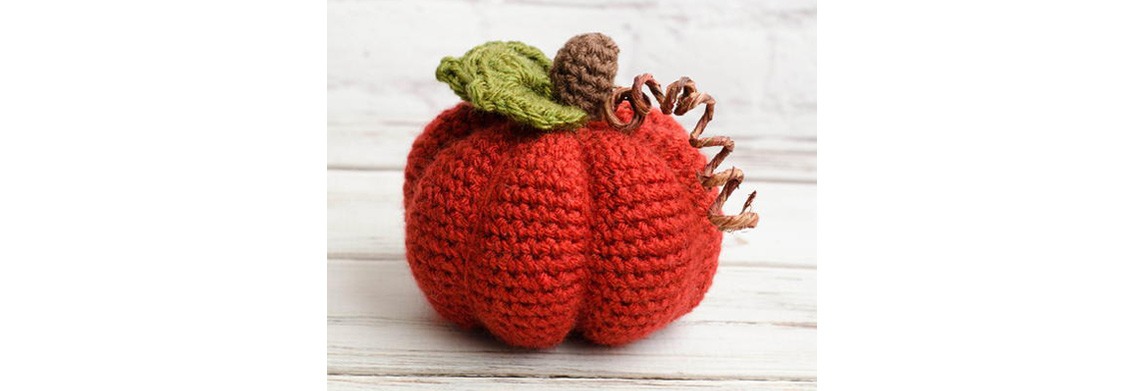
Happy Halloween Pumpkin
Abbreviations:
ch: chain stitch
st: stitch
sc: single crochet
(*): when you see instructions written between parentheses, work these instructions as many times as the pattern tells you to.
inc: single crochet increase
dec: single crochet decrease
sl st: slip stitch
BLO: back loops only
FLO: front loops only
FO: fasten off
Here is what you need:
Light weight yarn in orange (experiment with a fiery red, too. It works.) and brown (a rest of 15 g will do) Recommendable is sport or DK yarn, suitable for crochet hooks, size 2.5 to 3

Stuffing, - old yarn ends, polyester stuffing from a torn cushion, almost anything will do. Our tip: mix your stuffing with some scented leaves, such as rose petals or hay flowers. Your whole house will catch that magic smell instantly.
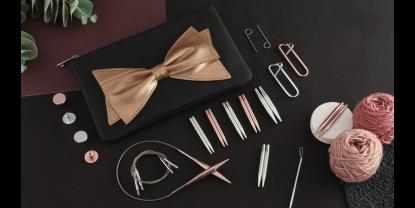
Crochet hook, size 2.5 or 3, try our Trendz single-ended hooks, as they are light, but sufficiently smooth enough for the small craft. Also, our Waves series usually works very well, as the rubber grip will support your hand, while maneuvering the extra smooth tip through the rounds.
Stitch marker. It is optional, however, there are quite a few rounds to crochet in the magic ring, and a stitch marker will simply allow you to keep track and definitely save you some time.
Happy Halloween Pumpkin
Orange yarn:
Rnd 1: start 7 sc in a magic ring
Rnd 2: incl 7 times
Rnd 3: (inc, sc in next st) repeat 7 times
Rnd 4: (inc, sc in next 2 st) repeat 7 times
Rnd 5: (inc, sc in next 3 st) repeat 7 times
Rnd 6-11 : sc in all 25 st [35]
Rnd 12: (dec, sc in next 3 st) repeat 7 times
Rnd 13: (dec, sc in next 2 st) repeat 7 times
Rnd 14: (dec, sc in next st) repeat 7 times
Rnd 15: dec 7 times FO with at least 24 inches of yarn.
Weave yarn tail through the last 7 stitches and pull to close the top. Do not weave in the yarn tail yet.
Finish the pumpkin by taking your yarn end around the outside of the pumpkin and weaving it back through the middle. Pull it nicely to create an indented section. Repeat until you get a total of 6 sections. For each section you can stitch the yarn back through multiple times for a more defined look.
Stem: in brown yarn
Rnd 1: start 5 sc in a magic ring
Rnd 2: BLO (FLO) sc in all 5 st
Rnd 3-4: sc in all 5 st
FO Leave long enough end of yarn for sewing. Without stuffing, sew stem onto the pumpkin top.
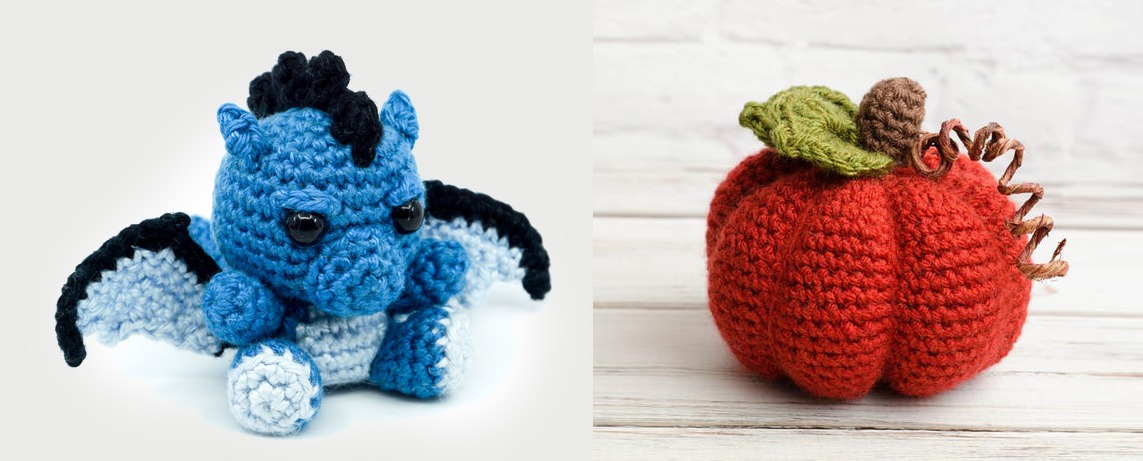
Dragon baby
This pattern is slightly more demanding, but easy to complete, as this cute little baby dragon will fit in the palm of your hand.
Here is what you need:
Lightweight blue yarn in three shades, should be 100 % cotton, 125m / 50 g
Crochet hook, size 2.5
pair of scissors
yarn needle
stitch marker
pair of black, pearly eyes
polyfill or any stuffing you prefer

Head and Body:
Rd 1: 6 sc into magic ring
Rd 2: 1 increase, repeat until at the end of the round you have 12 stitches
Rd 3: 1 sc, 1 increase, repeat until at the end of the round you have 18 stitches
Rd 4: 1sc, 1 increase, then 2sc, 1 increase, repeat 5 times, 1 sc (24 stitches)
Rd 5: 3sc, 1 increase, repeat till at end of round you have 30 stitches
Rd 6 - 11: each rd 30sc
Rd 12: 3sc, 1 decrease, at the end of round you have 24 stitches
Rd 13: 1 sc, 1 decrease, 2 sc, 1 decrease, repeat 5 times, 1 sc (makes 18 stitches)
Rd 14: 1 sc, 1 decrease, repeat till 12 stitches at the end of round
Rd 15: crochet the complete rd into the front loop only, 1 sc, 1 increase, repeat until you have 18 stitches at the end
Rd 16: Fill the head. 7 sc, change yarn colour to a lighter shade, 4 sc, colour change to darker shade, 2 sc, 1 increase, repeat 2 times, 2c, (24 stitches)
Rd 18/19: 9 sc, colour change to lighter shade, 6 sc, colour change to darker shade, 9 sc (24 stitches)
Rd. 20: 1 sc, 1 decrease, 2 sc, 1 decrease, 2 sc, colour change to light shade, 1 decrease, 2 sc, 1 decrease, colour change to dark shade, 2 sc , 1 decrease (repeat 2x) 1 sc (18 stitches)
Rd 21: Crochet the complete round into the back loop only, 1 sc, 1 decrease, repeat till end of rd you have 12 stitches
Rd. 22: Fill the body (not too tight, yet) 1 decrease, repeat till end of rd (6 stitches
Finish: Cut the yarn, generously and weave in the leftover yarn
Legs:
Crochet two legs in the darker and the lighter shade in spiral rounds with single crochet stitches. Legs do not need to be filled, as the yarn will be stiff enough to provide sufficient support.
Rd 1: 6sc in light colour
Rd 2: 1 increase, repeat until at the end of rd you have 12 stitches
Rd 3: change to dark colour, crochet the complete round into the back loop only (12 stitches)
Rd 4 - 5: 2 rounds with 12 stitches each
Rd 6: 1 decrease, repeat until you have 6 stitches at the end
Cut the yarn generously and leave a long tail for sewing.
Arms:
The arms are crocheted in the darker shade in spiral rounds with single crochet stitches.
Rd 1: 6 sc into a ring
Rd 2: 1 sc, 1 increase, repeat till 9 stitches
Rd 3 - 4: 2 rounds of 9 stitches
Rd. 5: 1 sc, 1 decrease, repeat till 6 stitches
Fill the arms with a tiny bit of stuffing, cut the yarn sufficiently long and leave a long tail for sewing.
Muzzle
The muzzle is crocheted in the darker shade ins spiral rounds with chain and single crochet stitches
Rd 1: 6 sc into magic ring
Rd 2: 1 increase, repeat till end of rd. (12 stitches)
Rd 3: crochet 12 sc
Rd 4: crochet only 2 sc
Cut the yarn generously and leave a long tail for sewing
Tail

The tail is crocheted in the darker shade in spiral rounds with single crochet stitches.
Rd 1: 4 sc into magic ring
Rd 2: 1 increase, 2 sc (5 stitches)
Rd 3: 2 sc, 1 increase, sc (6 stitches)
Rd 4: crochet 6 sc
Rd 5: 1 increase, 5 sc (7 stitches)
Rd 6: crochet 7 sc (7 stitches)
Rd 7: 3 sc, 1 increase, 3 sc (8 stitches)
Rd 8: crochet 8 sc (8 stitches)
Rd 9: 1 increase, 7 sc (9 stitches)
Rd 10: crochet 9 sc
Rd 11: 4 sc, 1 increase, 4 sc (10 stitches)
Cut the yarn generously and leave a long tail for sewing
Wings (2x):
The wings are crocheted in black and the lighter shade in rows with chain stitches and single crochet stitches.
Start with black rows..
R 1: crochet 18 chain stitches
R 2: 1 sc into the 2nd stitch, 7 sc, skip 2 st., 7 sc (15 stitches)
R 3: switch to the lighter shade, 1 turning chain, 7 sc, skip 1 st, 4 sc, 1 decrease (9 stitches)
R 4: turn without turning chain, 1 decrease, 3 sc, skip 1 stitch4 sc, 1 decrease (9 stitches)
R 5: turn without turning chain, 1 decrease, 2 sc, skip 1 stitch, 1 sc, 1 decrease, (5 stitches)
R 6: 2 sc, 1 stitch into 2nd stitch from the hook, turn the wing, 2 sc, skip 1 stitch, 1 sc, 1 slip stitch
Spike crest
The spike crest is crochet in rows of black yarn.
R 1: crochet 1 chain stitches
Spike: 1 sc into the 2nd stitch from the hook, 1 chain stitch, 1 double crochet into the next stitch on the chain, 2 chain stitches, 1 slip stitch into same stitch as the double crochet stitch, 1 slip stitch
Spike 2 - 5: 1 sc, 1 chain stitch, 1 double crochet, 2 chain stitches, 1 slip stitch into the same stitch as the double stitch 1 slip stitch (repeat 4x)
Spike 6: 1 sc, 1 chain stitch, 1 double into the next stitch, 2 chain stitches, 1 slip stitch into the same stitch as the double stitch, 1 slip stitch (repeat 4x)
Cut the yarn generously and leave a long tail for sewing.
Eyebrows (2x):
The eyebrows are crocheted in rows of 4 chain stitches in the darker shade
Ears (2x):
The ears are crafted in rows of chain stitches, single crochet stitches and half double stitches.
R 1: crochet 3 chain stitches
R 2: 1 sc into the 2nd stitch from the hook, 2 half double stitch (2 stitches)
Leave yarn on both ends, so you can assemble the ears tightly.
Assemble all parts of the body starting with the legs. Before you close the body at the bottom, check if the stuffing is sufficient. If you feel, it could be stiffer, replete it until the dragon has a full round belly. The beady eyes should be four stitches apart in the upper half of the face.


