So you are proudly mastering the basic crochet stitches and know how to make neat edges. But as a crochet enthusiast, you continually seek to expand your skillset and create stunning and exclusive fabrics. We have an easy crocheting hack that will provide you with enormous creative potential, which every crocheter should know about.
How are the Front and Back Loop stitches created?
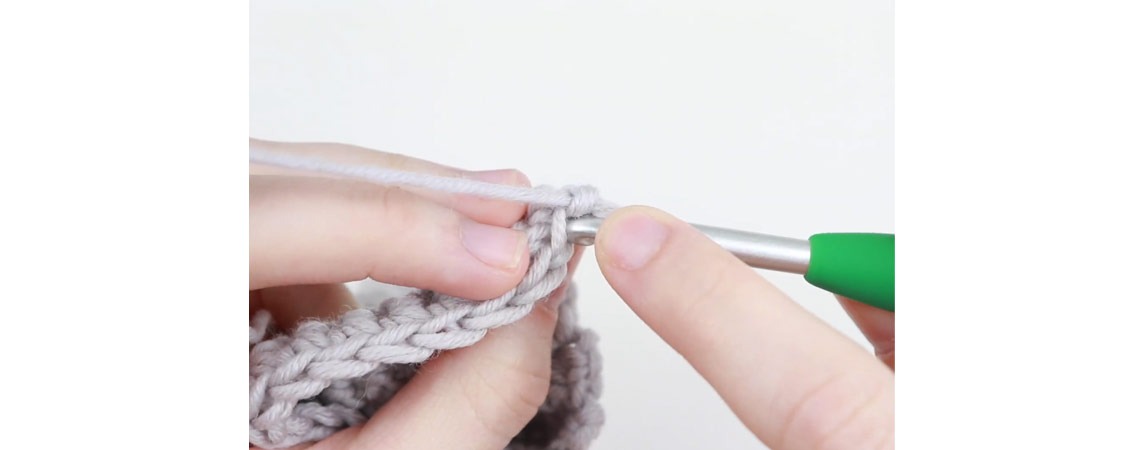
The tutorial cannot be simpler: Instead of inserting your crochet hook through the two bars at the top of each stitch, consider inserting it only through the front or back loop. By crocheting in solely the front loop (FL) or only the back loop (BL), you can create a unique textured fabric that looks distinct from the traditional method of crocheting through both loops. Although this may seem straightforward, additional techniques are involved in this method that can expand the possibilities of this crochet trick. Therefore, it's worth reading on to understand the full potential of this crochet approach.
What is the difference between FL and BL Crocheting and normal Crocheting?
Examining the fabric's surface, you can usually tell whether a stitch was worked through the front loop (FL) or back loop (BL). If a stitch were worked through both loops, you would typically see a series of V-shaped stitches on both sides of the fabric.
When an FL stitch is completed, you will see that the unworked loop is starting to create a ridge across the work, and the front half of the loop is stretched out a bit. It looks like a regular stitch on the other side of the work.
Conversely, if a stitch was worked through the back loop only, you will see a ridge or "bump" on the back of the fabric, whereas the front will be relatively flat.
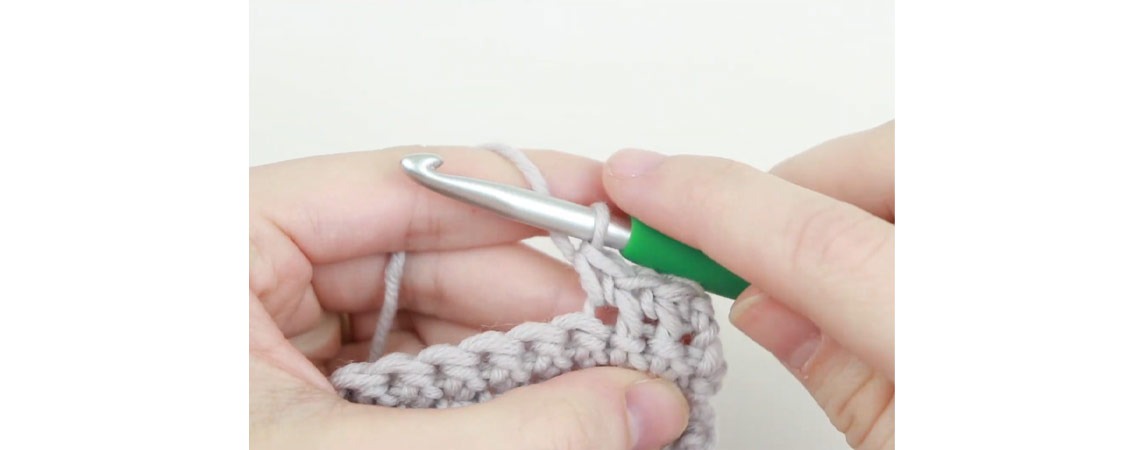
In some cases, it may be challenging to determine whether a stitch was worked through the FL or BL just by looking at the fabric's surface, mainly if the piece is densely crocheted or has a complex pattern.
Also, the appearance of front loop and back loop crocheting can differ in the different types of crochet stitches, like single crochet, half double crochet, and double crochet.
When working in FL or BL for single crochet stitches, the ridge or "bump" created by the single front loop (or back loop) will be relatively narrow and prominent, and the back of the fabric will be flat or smooth.
For half-double and double crochet stitches, the ridge or "bump" created by working in FL or BL will be broader and more prominent than for single crochet. In addition, the back of the fabric may have a slightly different texture.
What is Front and Back Loop Crocheting used for?
Both techniques are generally chosen when your crochet hook needs to create textured, seamless patterns.
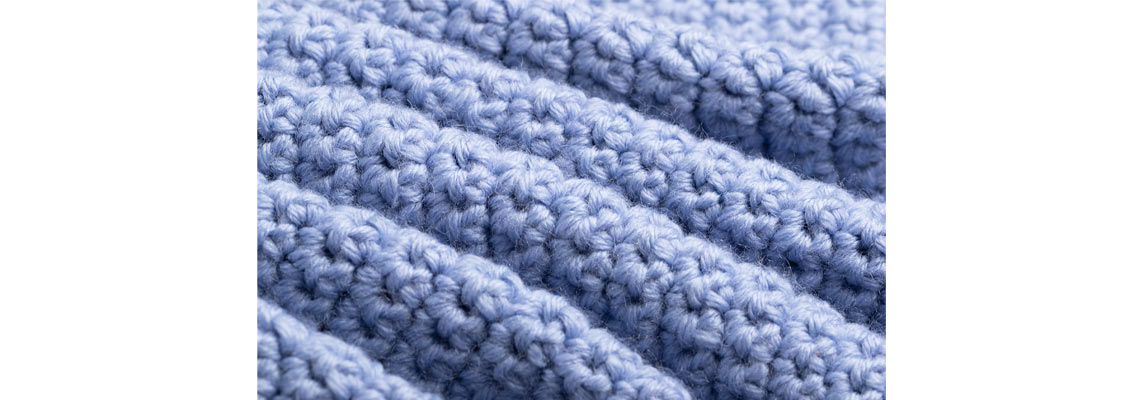
Ribbing: Crocheting in the front loop of each stitch creates a ridged texture you often see in ribbing textures on garments like sweaters, hats, and gloves. This way, you craft a ribbed band using BL crochet stitches that match the width of your garment and then sew it onto the edge of your piece with a yarn needle. This procedure allows you to add the desired stretch and texture of ribbing to your garment while maintaining a clean and professional finish. Of course, you can also work the ribbing directly onto the garment by picking up stitches along the edge of your piece, then working the ribbing in rows or rounds.
Basketweave: Indulging in the art of interchanging front loop (FL) and back loop (BL) crochet stitches can result in a mesmerizing basketweave texture. The stitches are typically worked in groups of four, and you alternate the pattern every four rows or rounds. This way, you design a textured fabric almost like a basketweave. It works excellent for crafting snug and warm items like afghans, scarves, and other cozy accessories.
Lace: Crocheting in the front loop only can create a lacy effect that is great for shawls, doilies, and other delicate items. One quick and lovely crochet lace stitch is the "single crochet two together in the front loop" stitch. To make this stitch, insert your crochet hook into the front loop of the first stitch, yarn over, pull up a loop, insert your hook into the front loop of the next stitch, yarn over, pull up a loop, yarn over, and then pull through all three loops on your hook. Repeat this process across the row or round, and you'll end up with a delicate lace fabric with a stunning texture.
Textured stitch patterns: Using FL crochet stitches combined with other stitch patterns can create unique textures and effects, such as the popcorn stitch, which uses FL stitches to create a raised "popcorn" effect. Crocheting in the back loop only can create a bumpy texture that is great for items like dishcloths, pot holders, and coasters. Combining BL or FL crochet stitches with other stitch patterns can create wonderful effects, such as the shell stitch, which uses BL stitches to create a scalloped edge.
Ruffles: Using BL crochet stitches combined with other stitch patterns can create ruffles and waves that add a playful touch to items like baby blankets, scarves, and skirts. Additionally, varying the height of your stitches or using different colors can further expand the possibilities of this crochet hack.
Mastering front and back loop crocheting will add new dimensions to your crochet projects. It is a simple yet visually immensely effective technique that every crocheter should have in their repertoire.


