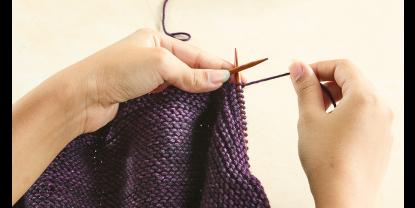
Knitting is not only highly meditative, they are also highly addictive. Knitting for hours without stopping? No problem. Knitting, even when your back begins to hurt and your hands are feeling numb? Also no problem. Because knitting means happiness, and we all are looking forward to finishing that beautiful item under our fingers with flying needles.
However, as much as we all enjoy the craft, squinting on our needles until our wrists hurt and our fingers cramp is not what it is supposed to be about. It is essential to take special care about their main knitting tools, - your hands. And this applies not only to all avid knitters but also to beginners who only knit occasionally.
Take a few breaks, at least after every thirty minutes and rest your muscles for a few moments. Here are a few useful ideas on how to build and practice a little self-care routine every day which your hands and forearms will thank you for.
- Before you start: The finger and wrist stretch
You can perform this stretch before even starting to knit. This exercise warms up your muscles and smoothes your joints which you use to tension your yarn. Extend your arms in front of you, forming an even line with your shoulders, i.e. not too high and not too low. Keep the elbows as straight as you can without forcing them, though. Now make a loose fist and bend your wrists downward until you begin to notice a stretch in your forearms . Rotate your fists lightly until the backs of your hands face each other. Do not worry, if you do not entirely succeed. This exercise is about the soft movement not about the performance. Once your hands get warmed up, the joints which hold your joints together will become smoother. Knitting will become more comfortable instantly.
- Finger flexing stretch
This exercise works on the muscles you use to hold your needles and create stitches. Extend one arm in front of you, keeping your elbow straight and flex your wrist as if signaling “stop”. Use the other hand to gently bend your wrist and fingers toward you. Hold this stretch for a few seconds. Reverse and repeat for the opposite arm. Stretch gently. This will give your muscles some relief so that they can keep doing their job.
- Spider on the wall
Place both your hand palms on a flat wall in front of you and lean forward until you notice you have put a considerable part of your weight onto your hands. Make sure you feel the weight in your hands and not in your shoulders. Press for a few seconds against the wall. Release a part of the weight and make your fingers crawl the wall up and down like two spiders. This is a fun exercise which will not only smooth the many little tendons of your fingers and backs of your hands, it will also release some of the tension in your shoulders and arms.
- Hand wrestling left and right
Put your hands holding them up as if for praying or in a namaste position. Then clasp your fingers tightly. At the same time guide your wrists gently towards one another until they touch. With your right hand drive your left wrist into the opposite direction and vice versa. Make sure to keep your arms positioned like a firm lever during this exercise. Repeat ten times per wrist with each movement lasting for about 3-5 seconds. This exercise is like a bodybuilding exercise for your wrists and fingers.
- Vertical and horizontal finger stretch
For this stretch put your hands together in a prayer position as in the above exercise and carefully increase the space between each finger. Keep your fingers pressed against each other and activate the muscles by slowly moving the fingers away from each other with some tension. Repeat this in different positions, placing your right hand downwards, then your left hand downwards. Pause for a few moments, and shake your arms and hands, then repeat.
- Mattress stitch
Hold your elbows up in front of your chest and lock your fingers. Then extend your palms and pull on your fingers as if they were trying to escape each other’s grip. Keep the tension in your fingers and not in your arms. It is important to keep your shoulders down as much as you possibly can. Hold this position for a few seconds and breathe deeply. Then release and repeat.
- The Air swimmer
Hold both your arms over your head but not straight up in a 90 degree angle. Turn them in a 30 to 40 degree angle forward, so you can still just about see your arms. At the same time, keep your shoulders as far down as you possibly can. Then, move your hands and arms quickly and lightly as if paddling in shallow waters. Keep going for a few seconds, then relax your arms and repeat. This exercise will not only relieve your shoulder and neck muscles but it will get your entire blood circulation going. Tingling fingers are often the result of tension in other body parts, such as arms and shoulders. When you suffer from numb or painful fingers you will notice the positive results of this exercise immediately.
- The starfish stretch
Hold your arms outstretched to your left and right at a 90 degree angle. Keep your shoulders down and clench your fist tightly and quickly. Then release them dramatically but gently as wide open as you can. Imagine your hands as a pair of starfish or octopus making a dance move on the water. You can perform this exercise with both fists at once or one after the other. Repeat several times.
- Joint, finger and wrist massage
Warm a few drops of your favorite oil up in your hands. Gently yet firmly grab each finger with your whole hand and massage it in a gentle, circular motion. You can start with those fingers which hurt most and then proceed to all the other fingers. Rub each joint gently for a few seconds. Switch hands and perform the same massage, making sure you massage each finger entirely. Afterwards, hold your arms in front of you making sure your shoulders are held downwards and feel as relaxed as possible. Make a gentle fist and rotate your wrists in front of your face softly in a clockwise direction. Relax, then repeat in an anti-clockwise direction.
- Knit on more than one project at a time
This welcome news is actually our favorite exercise. Knitting a lot is good for your hands! Because hand pain can be caused by repetitive strain you can actually prevent injuries by varying your stitches and knitting styles! There are many different knitting styles out there, all using different types of motions and hand positions to make the same stitches. Most knitting styles can become quick with years of practice, just make sure you learn new stitches and techniques and vary them with the ones you already know. Working on different projects that also use different yarn weights, different stitches, and different needle sizes can actually help to avoid repetitive stress injuries.
Perform these exercises before, after or in-between your knitting sessions for the highest benefit. They ensure that you can keep pursuing your passion throughout a lifetime and prevent any damage it may cause to your hands. Also consider where you sit and how you sit. Do you have good light, back and arm support? Consider placing a cushion on your lap and rest your arms to reduce the workload.
Do you like this the Mindful blog? Do you want to read other interesting things about Knitting? If yes please check our similar blog click here.


