A crochet magic ring is an innovative technique of the craft. You can crochet a magic ring with any crochet hook (single-ended, double-ended or even the unique Afghan/ Tunisian). The magic ring is known by many names such as a magic circle or magic loop (there is one in knitting too), all of which refer to the method of making a closed ring. The popular starting method when working on round projects such as Amigurumi patterns is as it leaves no hole in the centre of your project! This technique is used for all kinds of projects including hats, cute Amigurumi projects, the closed granny square and more.
What is the Magic Ring Technique?
The magic ring is a great way to begin a crochet project that’s worked in the round. The traditional way to start crocheting in the round is making 2 chains and then working all stitches of the first round in the 2nd chain from the hook. Using 2 chains is not perfect though as sometimes it can leave us with a hole in the middle of the circle which is hard to close later on and that’s where the Magic Ring comes to the rescue! With an adjustable magic ring, you simply make all the stitches around the loop/ring created and then pull at the starting tail to close the ring as tight as you want. If the hole in the middle re-appears after crocheting more rounds you can still tighten it at any time at the later stage.
How to Crochet the Magic Ring?
The magic ring is worked in two parts. The first step is to make the adjustable loop. Then, the next step is to work whatever stitches your pattern calls for into that adjustable loop.

Step 1: Loop the Yarn around Your Fingers
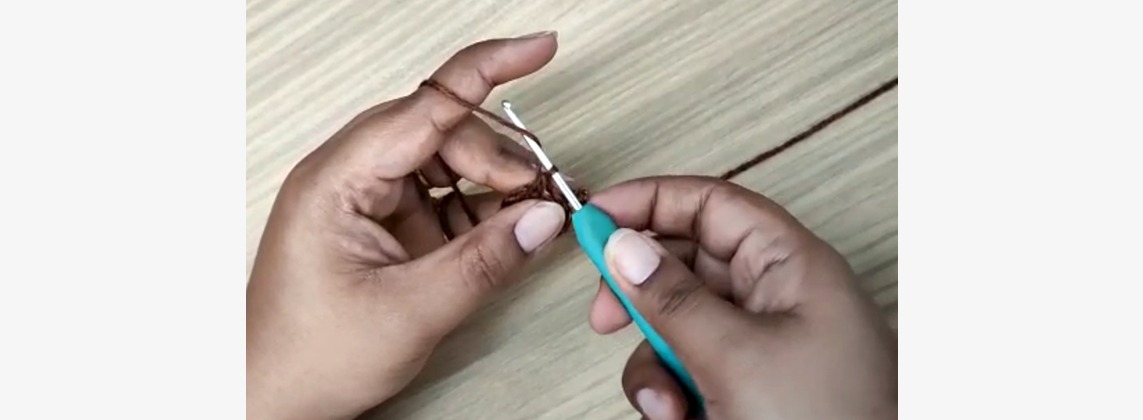
Place the ball of yarn on the table. Lay the tail end of your yarn against your open left hand, with the tail end pointing toward you. Loop the working end (aka ball end) of the yarn loosely around the back of your first two fingers. Cross the working end of the yarn over on top of the tail end, and to the left. Use your thumb to pinch the yarn where it intersects, holding it in place.
Turn your hand toward you until your palm faces down toward the table. When you look at the back of your hand, you should see two parallel strands of yarn. The working yarn (aka ball end) will be on the left, and the tail yarn end will be on the right.
Step 2: Insert the crochet hook and pull up a loop.
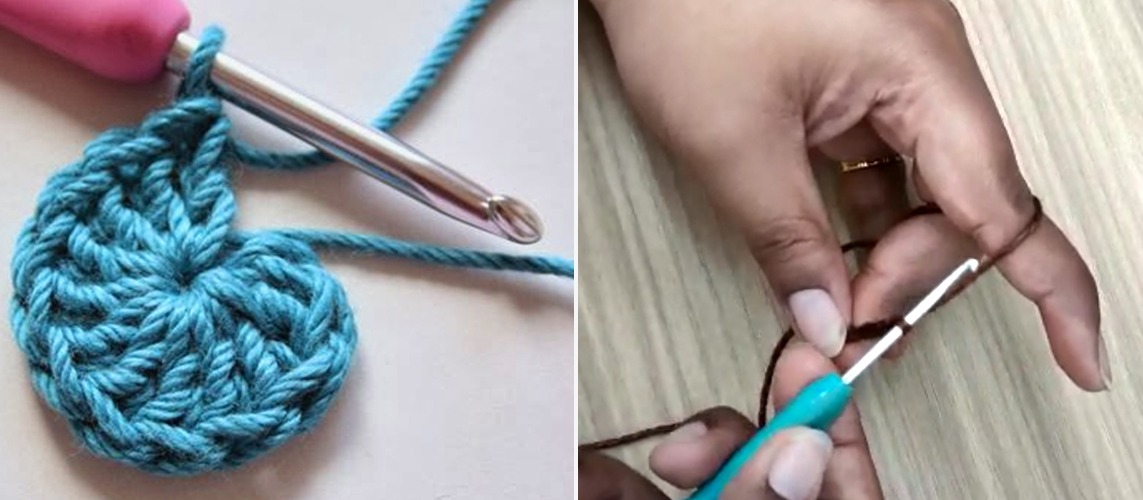
Hold the crochet hook in your right hand. Working from right to left, slide the crochet hook under the right-hand piece of yarn and over the left-hand piece. Grab the left-hand yarn and pull up a loop. As you pull up, rotate the hook up towards you.
Step 3: Chain 1 or the required number of chains.
Continue holding the circle of yarn in your left hand. Wrap the working yarn from back to front over the hook. Draw the yarn through the loop on the hook. This completes one chain. (This does not count as a stitch.) The number of chain stitches you make in this step depends on the type of stitch used in the first round of the pattern.
If your pattern starts with a round of double crochet stitches, you’ll only make this 1 chain. Similarly, for a round of half double crochet, make 1 more chain for a total of 2 chains, and for a round of double crochet stitches, you need a total of 3 chains.

Step 4: Make stitches into the ring.
Now it’s time to make your first round of stitches into the ring. Insert the hook into the centre of the ring, yarn over and draw up a loop to begin your first double crochet. (You will be crocheting over both strands: the loop and the yarn tail.)
Complete the double crochet: Yarn over and draw the yarn through both loops on the hook.
Continue making stitches into the loop until you have finished the number required according to your pattern. The ring may still look too loose and open, but we will fix that in the next step.
Step 5: Tighten the ring.
Hold on to your stitches with the fingers of your right hand. With your left hand, pull the yarn tail to draw the centre of the ring closed (like a drawstring bag). As you do this, the turning chain and the last stitch of the round will come closer together.
Step 6: Slip the Stitch to close the round.
If you are working in joined rounds, work a slip stitch into the first stitch to join the round. (Be careful not to stitch into your chain, but rather the first stitch of the round.) Then, continue with the pattern.
If you are working in a continuous spiral, do not join the round with a slip stitch. Instead, simply start the next round in the first stitch of Round 1.
If the centre ring loosens as you work the pattern, you can pull on the yarn tail again to tighten it back up. Once you weave in the ends, it should stay neatly or perfectly in place.


