Knitting a sweater for yourself or for a loved one is one of the big milestones for a knitter. After you’ve learnt your knit and purl stitches, you would want to dive straight into a project. You can start with a scarf or dishcloth but then why not get started with a garment for yourself or a loved one? To make things simple, in this blog we’ll cover everything you need to know for your first sweater.
Essential Knitting Techniques for the Sweater Project
Before you think of a sweater project, make sure to have some knitting basics under your belt.
Slip Knot – The first step of knitting, the slip knot attaches the yarn to a knitting needle. The loop on the needle is counted as the first cast on stitch.
Cast on – The method to make stitches that do not count as the first row of the project but lays the foundation of the project. There are many ways to cast on stitches, from stretchy techniques to ones with constricted stitches. For knitting a sweater, the German twisted cast on works smoothly.
Knit and Purl Stitches – Knitting has only two stitches- knit and purl. All stitch patterns are based on these.
Increases and Decreases – Increases and decreases are simple knitting techniques. There are many ways to get this done. A pattern designer always recommends the method. Increase means adding a stitch in comparison to the previous row or round and decrease means reducing a stitch.
Cast off – Like casting on, cast off is an important step to end a knitting project. Also known as bind off, this means to secure your stitches before taking the project off the knitting needles.
Weave in yarn ends – Every project and pattern demands their own ways to weave in yarn ends neatly. Make sure to have a few tricks.
Have a handy chart of knitting abbreviations and how to read charts and knitting pattern.
With practice of these techniques, you are ready to give a sweater a go!
Choose a beginner sweater pattern
The first step into the wonderful world of garment knitting requires some help and guidance. A knitting pattern is ideal for your beginner project as it takes you through exact step-by-steps to knit.
Choose a pattern that is suited to your knitting abilities. A boat neck or crew neck sweater with some easy ribbing (alternating knit and purl stitches) and lots of garter stitch (all rows of knit stitches) or simple stocking stitch pattern known as Stockinette (alternating rows of knit and purl stitches).
If knitting an adult sweater seems a big task, you can opt for a smaller scale project for the little ones or for a pet.
Sweater Sizes
A pattern designer offers the pattern in multiple sizes. You can find S, M, L, XL versions along with notes to calculate your measurements. If you want to attempt without a pattern then you have to calculate on your own.
For a garment, you need the measurements of
- Chest/Bust around the fullest part.
- Neck circumference. Do consider positive ease. Do not take more than 25 cms larger than your actual neck measurement.
- Raglan, measured diagonally from your shoulder seam at the point where it meets the collar to the side seam at underarm.
- Armhole Depth from the top outside edge of the shoulder down to the armpit.
- Body Length from underarm to your desired length (crop, regular, long or tunic sweater).
- Waist around at height of navel.
- Back Waist Length from the most prominent bone at the base of the neck to the natural waistline.
- Cross back from shoulder to shoulder.
- Hip circumference at widest point.
- Sleeve Length from armpit to cuff with arm slightly bent.
- Center Back Neck to Cuff with arm slightly bent, from base of neck across shoulder around bend of elbow to wrist.
- Upper Arm around the widest section above the elbow.
- Wrist circumference.
- Elbow with arm bent.
Choosing the yarn
The yarn fibre and weight details are always mentioned in the knitting pattern. You will also know exactly how many grams or yards you will need. If you want to experiment, think of the recipient of the sweater. A baby sweater is different from adult-sizes. If you require warmth, merino wool or maybe an acrylic blend. Summers would require light yarns such as mohair or super wash. Chunky weight is perfect for a quick project. Colours are totally up to your choice. Even if the pattern recommends on colour you can add stripes by knitting at least two or three rows or rounds in the shame shade.
Yarn Category name |
Description |
Metric knitting needle size |
Knitting needle size |
Lace |
fingering, crochet 10-count thread |
1.5mm - 2.25mm |
0 - 1 |
Super fine |
sock, fingering, baby |
2.25mm -3.25mm |
1 - 3 |
Fine |
sport, baby |
3.25mm - 3.75mm |
3 - 5 |
Light |
DK, light worsted |
3.75mm - 4.5mm |
5 - 7 |
Medium |
worsted, Afghan, Aran |
4.5mm - 5.5mm |
7 - 9 |
Choosing Knitting Needles
After you’ve chosen the yarn, it’s time to decide upon the knitting needles. The needle size will be mentioned in the yarn label or the pattern. The general rule is heavy yarn weight = bigger needle sizes and light yarn weight = small needle sizes.
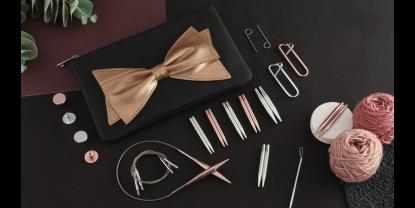
Now coming to the knitting needle type. You can knit sweaters with single pointed needles in parts and seam them together. Or, you can use circular knitting needles from the start to the finish of the project. Double pointed needles will help with your sleeves and necklines. It is recommend to have them all to start your project.
For materials, you can begin with bamboo. It is beginner friendly materials. Similarly birchwood such as Ginger and Symfonie range are also wonderful. Karbonz is the carbon fibre range that combines strength with smooth texture. The dedicated stainless steel knitting needles with a unique motivational word imprinted on its tip from the Mindful Collection is ideal for a mindful session of knitting.
Knit a Gauge Swatch
With your yarn and knitting needles in hand, do not hurry to begin your project. Start with a swatch also known as the tension square. A very important step for the successful completion of knitting projects, the gauge swatch is a sample of your entire project. Scarves, blankets, dishcloths, etc. can do without gauge. The project is small and you can get an idea of how the yarn behaves and even the amount you would needed to complete the project.
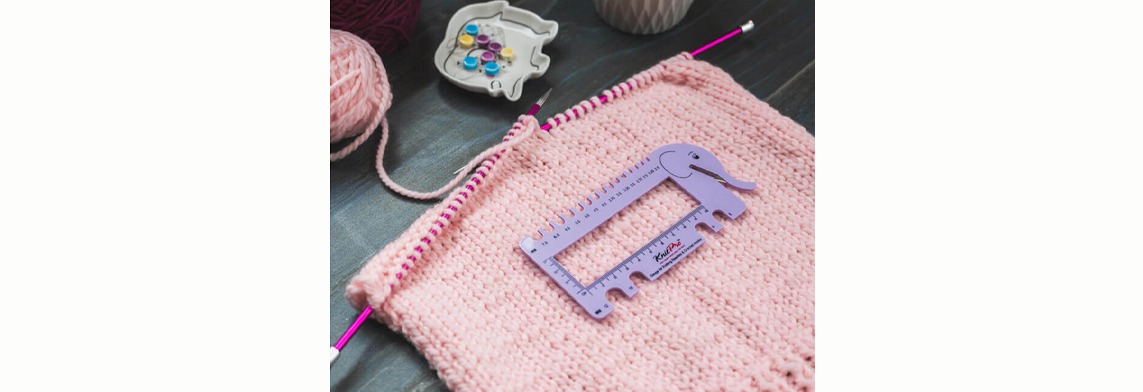
Knitting pieces are designed to fit a body, so you need to get accurate gauge so they'll come out the size the designer intended. Knit a 10 cm square swatch with the same knitting needles and yarn you’ll be using for the project. Wash and block according to instructions or details on the yarn label. After the square is dry, take a measuring tape or a gauge tool. Count stitches in a cm or inch vertically for the row count and horizontally for the stitch count. If you have the same number as the pattern instructs then you have the right gauge. Reknit on different needles if you need to, a bigger size if you have more stitches and a size smaller if you have less stitches. Even if gauge is different and you love the effect, go ahead with it. You can refer to our previous guide on tips to correct your gauge.
With all the above information, you are ready to knit your first sweater.
Happy Knitting!


